The vegetarian sausage: does it beat a Cumberland?

In short, to answer the question, no.  A vegetarian sausage does not beat a good old traditional sausage.

The company is Good Life, a vegetarian producer.  The branding is excellent on their products, they do look good.

They have a few varieties of sausages so for the first try, I went for French Bean and Spinach.

The ingredient list looks OK.  Only 34% of the ingredients are actually vegetable with a whopping amount of wheat so if you’re celiac this is not for you.  Nutritionally:

Each grilled sausage contains

  • 86 calories
  • Fat 3.0g of which 1.9g saturates
  • Carbohydrates 8.6g
  • Sugar 0.5g
  • Fibre 2.5g
  • Protein 4.8g
  • Salt .45g

Taking them out the box, they do not look appetising. But, one must try!

IMG_0108

They are cooked from frozen so it takes a while to cook. And I couldn’t stop checking out of curiosity.

  • To Grill
    Pre heat grill to medium. Remove all packaging. Place sausages under grill for 16-18 minutes, turning regularly.
  • To Pan Fry
    Pre heat 10ml of oil in a frying pan over a medium heat. Remove all packaging, add sausages to the pan and fry over a medium heat for 15 minutes, turning frequently.
  • To Oven
    Pre heat oven to 200oC /Fan 180oC /Gas 6. Remove all packaging. Place sausages onto a baking tray in the centre of the oven and cook for 20 minutes.

And here’s the finished product.  The “skin” didn’t hold up too well as you can see with the filling popping out the sides.

IMG_0111

From a taste perspective, they aren’t too bad!   I’ll take a Cumberland over these any day, though.

Would I buy them again?  Maybe.

Tash


Courgette, feta and mint frittata

Prepare for a taste sensation!!! I’d love to claim this is my recipe because it’s delicious.  I wanted some vegetarian inspiration for dinners and Delicious Magazine (whom I worship every month) gave me this.  Quick and super tasty.

Courgettes are a new thing for me.  Normally avoided, I did get sucked into the courgette spaghetti phase one night last year and was pleasantly surprised by this odd looking little vegetable.

The full recipe is here: Courgette, feta and mint frittata

The only substitute in mine was shallots instead of onions as I had some left to use up.

Enjoy a meat-free dinner with a side salad!

Tash


Messy Halloumi Burger

The mess comes when you eat it 🙂

This is a nice alternative to meat for lunch or dinner.  I’m not a cheese connoisseur, but give me two slices of grilled halloumi and I will be sorely tempted to eat the whole block (I never have for I am not a ….. glutton….)

IMG_0123[1]


Ingredients for 1 simple burger 

  • 2 decently thick slices of halloumi
  • 3 thin slices of aubergine (eggplant)
  • 2 slices of red onion
  • 3 slices cucumber
  • 2 slivers of avocado
  • A handful of rocket
  • 1 roll of your choice (I’m in love with Warburtons Soft Seeded rolls because of the low sugar content)
  • 1 tablespoon balsamic vinegar
  • A little aïoli and chili sauce of your preference

Method

  1. Put the onions in the balsamic vinegar for a few minutes. Drain then add the halloumi, aubergine and onion to a baking tray and place under a hot grill until the halloumi starts to bubble and brown slightly.
  2. On your bun, spread some aioli on one side.  The grand assembly order I go for:
  • Aubergine first
  • Cucumber next
  • Avocado
  • Onion followed by the halloumi
  • Top with rocket and some chilli sauce

Could something so tasty be so simple?  Yes!

Tash


Fully loaded, delicious chicken wraps

Woah.  It’s been ages since my last post.  I vow not to leave it this long again!

This week I’ll be eating a fairly standard dinner for a few nights.  Eating the same food for a few days really doesn’t bother me, although I appreciate for some people they need daily variety.  Having a pre-planned idea of what I’m eating during the week helps in many ways:

  • My budget.
  • Not wasting food.
  • Saving time, particularly if I can make batches of food that I can prepare in advance.
  • Pay attention to what I’m eating health wise.

This week, I’ve inadvertently ended up with chicken wraps.  It’s got a great balance of vegetables, protein and very low sugar.  I liked this combo so much I’m sharing it.

Total cooking time: less than 20 minutes!

Makes: 2 wraps

Ingredients (for the hot stuff)

  • 1 skinless, deboned chicken thigh per wrap (I have precooked a few pieces)
  • 2 multi-seed or wholewheat wrap
  • 1/4 red pepper, sliced
  • 1/4 red onion, sliced
  • 1 glove of garlic, crushed
  • Small handful of mangetout, sliced
  • Small dashes of cinnamon, cumin and paprika for smokiness

Ingredients (for the cold stuff)

  • 2 baby tomatoes
  • 2 slices cucumber
  • 1 tbsp sweetcorn (unsweetened, no added salt)
  • 1 tbsp sliced black olives
  • 1 small gherkin (pickled cucumber for the US readers)
  • 1 tbsp cottage cheese
  • Handful of sliced lettuce
  • Dash of balsamic vinegar

Method

  1. Gently fry the onion, red pepper and garlic until softened.  Add the garlic and spices, cook for a few more minutes.
  2. If you haven’t precooked your chicken, slice and add to the pan until cooked.  Like I said, time is key for me so I sliced a precooked chicken thigh and added it to the pan until thoroughly hot.
  3. Add the mangetout towards the end of cooking.  It’s a delicate little vegetable that can easily become too limp if cooked too long.
  4. Whilst the hot stuff is cooking, chop the cold ingredients and combine everything in a bowl except the cottage cheese and lettuce.  Add a few drops of balsamic vinegar.
  5. Heat up your wrap in the oven according to instructions.
  6. When the chicken is ready, your wrap is warm and the chilled salad mix is ready, start the grand assembly!  My preference for ordering is:
  • Lettuce on, then the salad mix
  • Add the cooked chicken mix
  • Top with the tbsp of cottage cheese
  • Wrap and enjoy 🙂 

I’m currently going through a MAJOR sriracha phase – sriracha on everything!!!  If you want a bit of a kick, add a little before you wrap and eat – this is where the sugar content of the meal came from and it can easily be left out. Unless you are in the grips of a similar addiction….

It’s the simple food that keeps me happy – and sane. The second wrap will be my lunch tomorrow and I can’t wait.

Enjoy!  If you have any suggestions for my new chicken wrap sensation, leave me a comment.

Tash


Korean Calamari with sushi rice

This adventure in food included me:

  1. Trying a new recipe courtesy of Nigella Lawson’s cookbook, “Kitchen”
  2. Eating squid.  I LOVE SQUID
  3. Totally messing up the cooking of sushi rice and having to re-cook it

Serves two people

INGREDIENTS

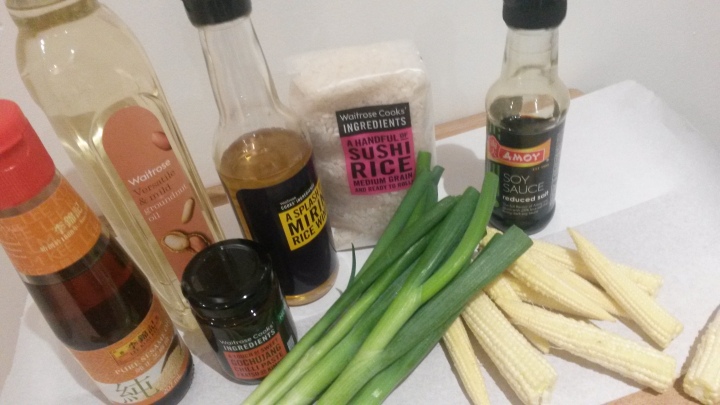
20151228_174846

  • 150g Sushi rice
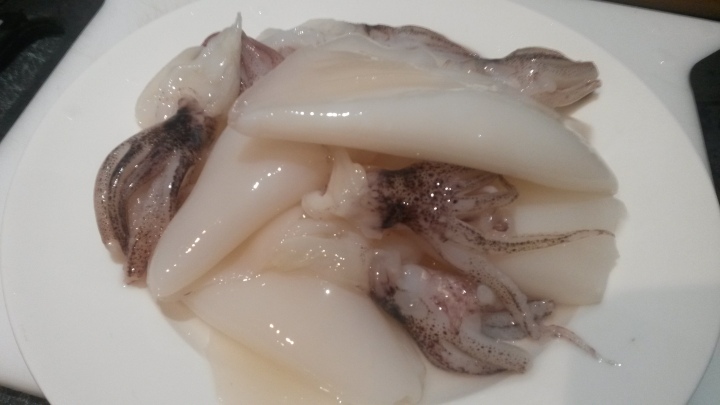
  • 6 baby squid (defrosted)
  • 2 tbsp rice wine
  • 2 tbsp Korean Gochujang paste
  • 2 tbsp soy sauce
  • 2 tsp sugar
  • 2 tsp sesame oil
  • 2 tbsp groundnut oil
  • 75g baby corn cut into 1cm pieces
  • 3 large or 6 small spring onions sliced

METHOD

Before going onto the method for this simply delicious dinner….

  • If your baby squid is not quite defrosted, run in under cold water until it’s ready
  • Gochujang paste is available in Waitrose.  From what I can see online, both Tesco and Sainsbury’s stock a sauce but I’d advise sticking to the paste if you can get it purely because the sauces are a lot more liquid which your rice shouldn’t be swimming in

20151228_174924

  • You can use alternatives to non-flavour oil to groundnut such as rapeseed or vegetable oils

METHOD

1. Make sushi rice as per packet instructions – see my drama with this rice below

2. Cut the calamari into rings and soak in the rice wine for 15 minutes.  Keep the tentacles, they are also very tasty!

20151228_180250

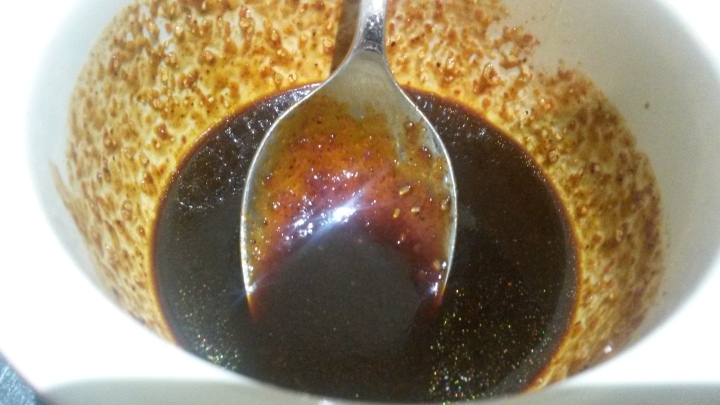
3. Remove the calamari from the rice wine and add the Gochujang paste, sugar, soy sauce and sesame oil to the wine

20151228_181555

4. I used a wok here.  Heat up the wok with the groundnut oil.  I always use a bit of kitchen towel to spread the oil over the entire surface of the wok to coat the pan and allow for the oil to be heated up evenly

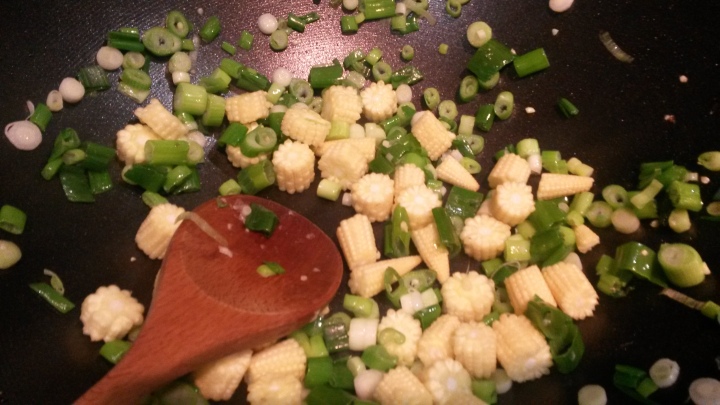
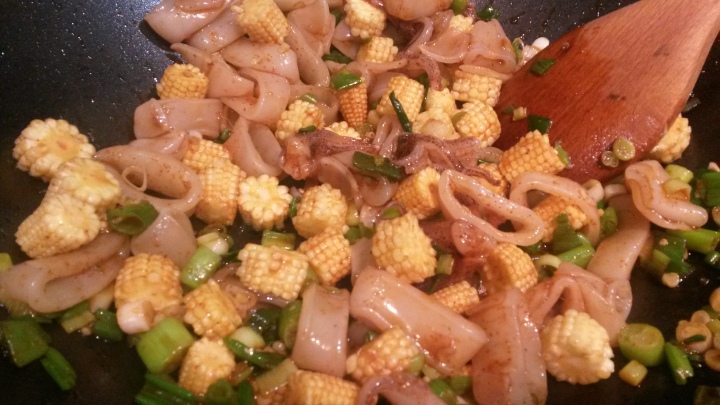
5. Stir fry the vegetables for two minutes

20151228_185217

6. Add the calamari and cook for two minutes

20151228_185344

7. Add the sauce and cook for a further 30 seconds, or until piping hot

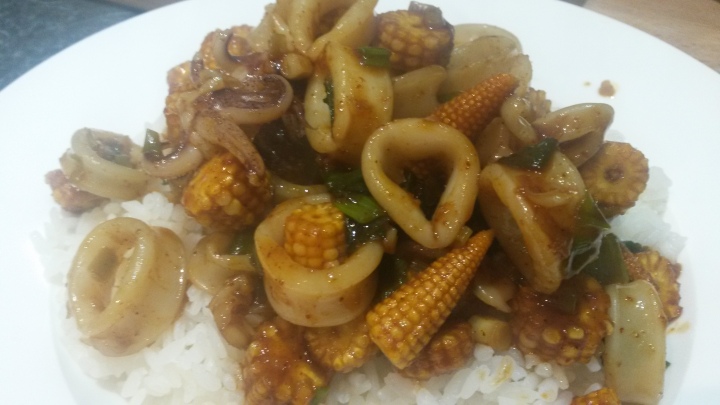
When cooked serve with the sushi rice

20151228_190007

SUSHI RICE DRAMA

I’ve only recently taught myself how to successfully cook white fluffy rice.  It’s quite embarrassing really!

Generally I don’t eat refined white breads, rice etc.  But sometimes, particularly with curries, basmati rice is my preference.  But, despite what I learnt about cooking white rice (thanks, Jamie Oliver), I followed the instructions on the Waitrose pack of sushi rice.  No pre-washing, nothing – measure out the rice and water, pop in a pan and wait 18 – 20 minutes.

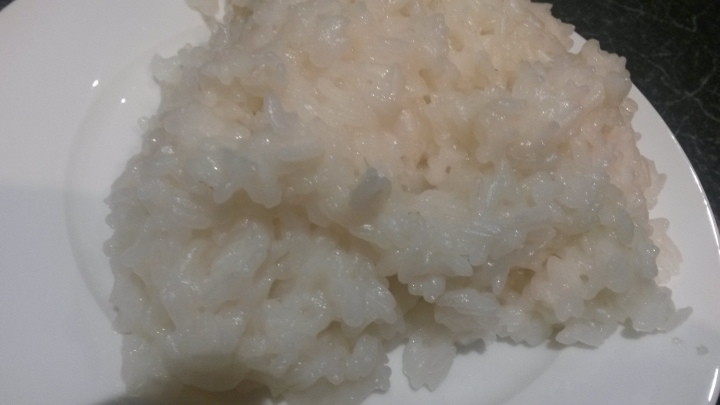
Waitrose, your instructions for cooking this rice are incorrect.  It turned into a soggy mass of starch whilst I stood there the entire cooking time keeping an eye on it.

20151228_185919
The disaster rice, cooked according to instructions

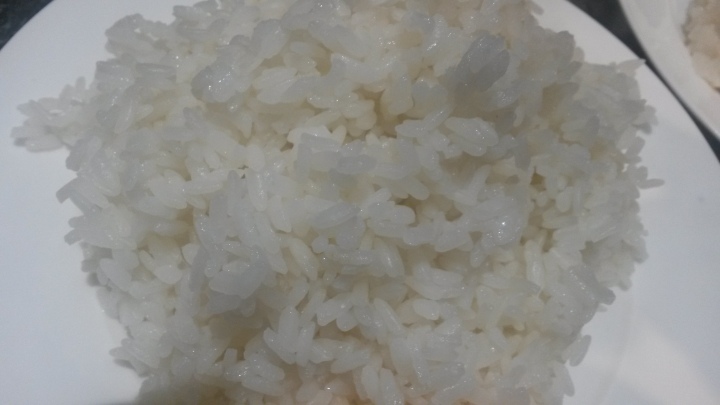
Take two: I followed Jamie Oliver’s instructions and remade the rice.  Successful white sushi rice.  Not gloopy!

20151228_185914
Sushi rice according to Jamie Oliver’s perfect fluffy rice

I hope you try this recipe out.  It took under 30 minutes to cook and was delicious, I can foresee this becoming a regular meal for me and I’m looking forward to exploring more ways to cook with Gochujang paste.

Natasha

Snowy Mountain – a chocolate wintry dessert

This is an old favourite of mine that I’ve made nearly every Christmas for the last few years.  It’s no bake (win) and isn’t too sweet.  With a chestnut and chocolate centre and a snowy frosting, this dessert looks pretty and wintry.

Serves six to eight

INGREDIENTS

Chocolate Centre

  • 100 dark chocolate (70%) broken into pieces
  • 50g diced unsalted butter
  • 435g chestnut puree
  • 75g golden caster sugar
  • 100g extra thick double cream
  • 1st vanilla extract

Snowy Frosting

  • 1 medium egg
  • 75g sifted icing sugar
  • 25g sifted plain flour
  • ½ tsp vanilla extract
  • 90g unsalted butter

METHOD

1. Set the chocolate and butter over a pan of simmering water and gently melt. Remove from the heat and cool to room temperature.

20151223_130023

2. Place the chestnut puree, sugar, cream and vanilla in bowl of a food processor and whizz until creamy. Add the chocolate mixture and mix again until you have a smooth puree.

20151223_132236

3. It should be firm enough to shape into a mountain shape, but if not, you can place in the fridge for a few hours until set.

20151223_132850

4. To make the frosting, whisk the egg and icing sugar together until smooth, then whisk in the flour. Bring the milk to the boil.

5. Whisk the milk into the egg mixture. Transfer to a non-stick pan and cook on a low heat for a few minutes.  Let the mixture bubble (but not boil) and keep stirring to smooth out any lumps.

6. Continue to cook until thickened into custard, pass through a sieve into a bowl. Stir in the vanilla and leave to cool completely.

7. To complete the frosting, beat the softened butter in a bowl until light and creaming. Using a handheld electric whisk, gradually whisk in the cooled custard.  Whisk at a low speed to begin with, then on a higher speed for a few minutes until it looks pale and fluffy.

8. Using a palette knife, smooth the frosting over the mountain. Finish with grated white chocolate and a dusting of icing sugar.

20151228_165844

It’s best served after about 30 minutes out of the fridge and will keep well for a few days.

20151228_170041


Enjoy!

Natasha

Leave the gun, take the cannoli

In Coppola’s GREAT film The Godfather, this is the instruction given by Peter Clemenza to Lampone after a murder on a deserted road. Cannoli was further immortalised in The Sopranos during one of Tony’s dreams where Dr. Melfi says, “Tony, I love your cannoli”. Saucy!

Hailing from Sicily, cannoli is one of my favourite pastry sweets.  I love it so much that I will go through the hours of preparation to have one!  If you’re a cannoli purist, look away now: I use marscarpone, not ricotta.  Ricotta does nothing for me, marscarpone is an equally good variant to use.

I’m not sure where I acquired this recipe from, I’ve used it for about four years and it never fails.  It’s time consuming but as in all love affairs with food, the end result is worth it.  This recipe makes about 15 cannoli tubes which can be stored in an air tight container for up to two months.

Items you will need

  • Cannoli tubes are essential (I use these – they have a good spring to allow you to pinch the tube and easily slide the cannoli shell off after cooking)
  • Pasta machine
  • 3.5 – 5 inch diameter pastry cutter
  • Pastry brush (if you haven’t already, get silicone!)

20151211_151454

Ingredients: shells

  • 190g white flour
  • 25 white sugar
  • 3g ground cinnamon
  • 20g butter (or shortening)
  • 1/2 egg
  • 1/2 egg yolk
  • 60ml sweet Marsala wine
  • 8ml distilled white vinegar
  • 30ml water
  • 1/2 egg white
  • 470ml oil for frying

20151211_142742

Ingredients: filling*

*this will fill about four cannoli, so adjust accordingly to how many you plan to eat.  And DON’T fill the cannoli in advance of eating as this results in the pasty becoming damp and you will lose the lovely crunch of the shell. 

  • 250g full fat marscarpone
  • 3 tsps icing sugar (adjust the sweetness to suit you, anything more for me is too sweet and ruins the taste of the marscarpone)
  • Chocolate pieces (cut up small, I use 65% dark)
  • Ground pistachios for the edges

Now, prepare yourself for a few hours of preparation and fun!

  1. In a bowl, mix the flour, sugar and cinnamon.  Cut the butter into the bowl (no bigger than pea size). Make a well in the centre and pour in the egg, egg yolk, Marsala wine, vinegar and water.

20151211_143000

2.  Mix with a fork until the dough becomes stiff, then finish off by hand, kneading for about ten minutes on a clean surface. Cover and refrigerate for 1-2 hours.

20151211_144154

3. Divide the cannoli dough into thirds and flatten each one just enough to get through the pasta machine.  Roll the dough through the setting until you get to the machine’s thinnest setting.  (Dust with flour if it’s sticking) Place the sheet of dough on a lightly floured surface and use the pastry cutter to cut out circles.  Dust the circles with a light coating of flour and roll the pastry around the cannoli tubes, sealing the edge with a bit of egg white.

20151211_160059

4. Heat the oil to 190 degrees C.  Fry the shells on the tubes a few at a time for 2 to 3 minutes until golden.  Use tongs to turn the shells if needed.  Carefully remove the shells from the tubes and place on a cooling rack over paper towels.

20151211_163236

Mix up the filling.  You can of course use whatever filling you like, if you don’t mind ricotta then that’s the more traditional filling.  Candied fruits are quite popular decoration, I LOVE pistachio so I prefer to have that on edges of the filled shells.

20151211_145823

Creamy, chocolate goodness!

20151211_145945

And enjoy!

20151211_213251

Tash

Bibigo: Korean food in London

If you’ve seen the film Oldboy (the original, naturally), or you are familiar with Korean cuisine, you’ll know that live baby octopus is a strange feature of the Korean menu to a total outsider. Yes. Live. Baby. Octopus. Eaten. Alive.  It’s called Sannakji.

A couple of weeks ago, I joined some colleagues for dinner after work at a Korean restaurant, Bibigo.  With no live baby octopus on the menu, and I can’t say I was disappointed, we proceeded to have a thoroughly delicious, filling dinner.

IMG_0030

At excellent value for money – three courses for a mere £13 – we tucked into fabulous tastes from a preset dinner menu.  My stomach loved these dishes.

Course One: Korean Chopped Salad 

A very understated looking salad, but an absolute winner with those of us that ate it.  Hints of sesame dashed with crispy fried spring roll pastry and soy dressing.

IMG_0033

Course Two: Baby Squid 

I’m a huge fan of squid in any form (dead, preferably).  Served with lemon and a tiny bit of okra.

IMG_0034

Course Three: Grilled Chicken

Beautiful with delicate rocket and some steamed riced on the side.

IMG_0035

Bibigo’s has two restaurants in the UK, both in London (Soho and Angel).  The gorgeous food aside, the Angel restaurant is super stylish and the staff are attentive.

Good to know:

  • My pet hate is the assumption of any restaurant to add a 12.5% service charge.  Bibigo’s is no different so it expect to see it on the bill.
  • You’re presented with chop sticks and a single silver spoon, get acquainted with the sticks ahead of your adventure!
  • White wine starts at £18 a bottle.
  • Prepare to have your taste buds tingled.
  • Portions are generous.  Did I already mention the value for money?!

Do yourself a favour, pop in for lunch and dinner and feast.

Tash


Quick Sausage casserole with tomato and chickpeas

This lovely casserole recipe comes from Delicious Magazine’s November issue.  And it’s divine!  The recipe makes enough for four portions – if you’re like me and feeding one, it made a great heated up dinner on the first working day of the week. It can also be frozen.

INGREDIENTS

  • 1 tbsp olive oil
  • 6 British sausages cut into chunks (I went for Toulouse sausages)
  • 2 onions, sliced
  • 2 garlic gloves, crushed
  • 4 fresh thyme sprigs
  • 400g tin chopped tomatoes
  • 200ml chicken stock
  • 2x 400g tins chick peas, drained and rinsed
  • 200g baby / young spinach
  • Squeeze fresh lemon juice

METHOD

  1. Heat the oil in a frying pan or cast iron casserole dish and brown all over, turning occasionally.  Set aside on a plate.
  2. Turn the heat down to medium and fry the onions for about 8 to 10 minutes until soft.  Add the garlic and thyme, lower the heat and cook for a further two minutes.
  3. Add the chopped tomatoes and chicken stock to the pan with the sausages and chickpeas.  Stir well and bring everything to a gentle simmer.  Cook for 15 minutes until the sauce has reduced and slightly thickened.
  4. You can place the spinach in a colander and pour a kettleful of boiling water over it, or simply mix the spinach into the mix as I did.

It’s very filling and super tasty!

Oh, and if you haven’t already learnt this: to soften onions without burning them, place a lid on the pan – it works wonders 🙂

Tash